Gmail BCC setup with Area 1
For customers using Gmail, setting up Area 1 via BCC is quick and easy. All you need to do is create a content compliance filter to send emails to Area 1 through BCC. The following email flow shows how this works:
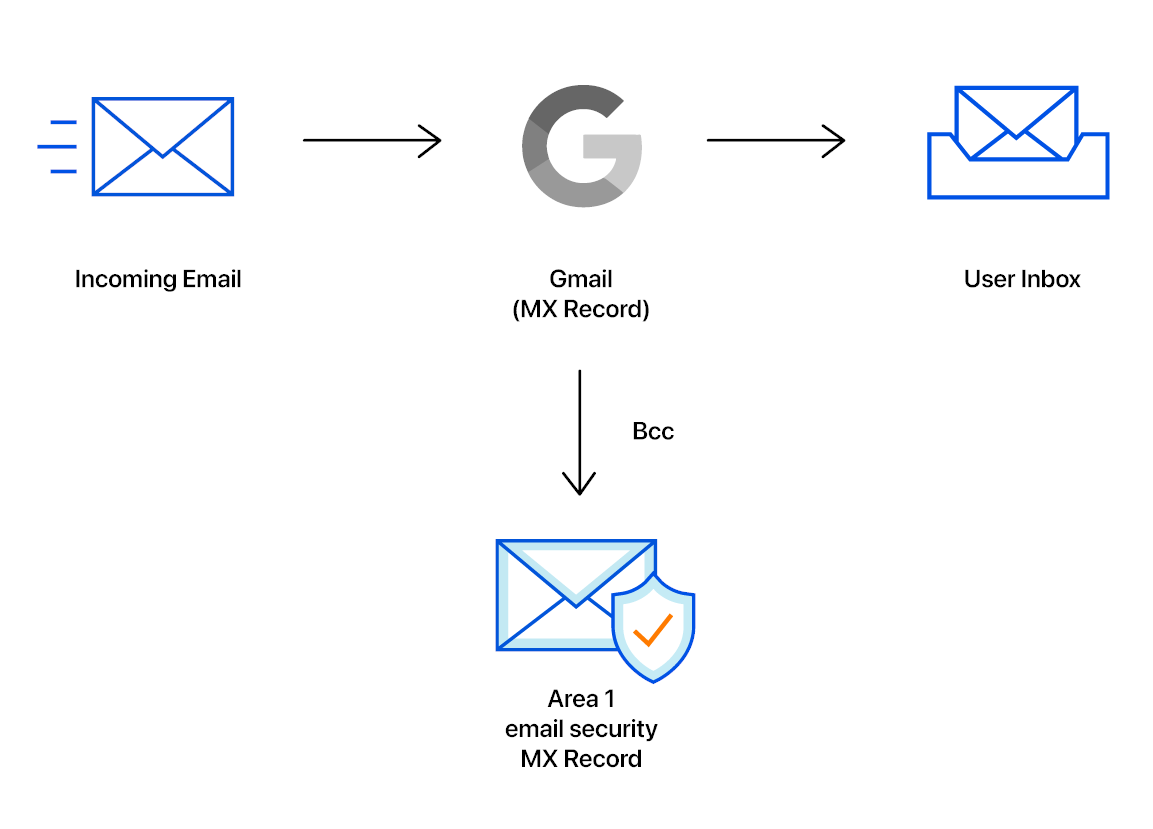
To setup Area 1 phishing risk assessment for Gmail:
In the Admin console, go to Menu > Apps > Google Workspace > Gmail > Compliance.
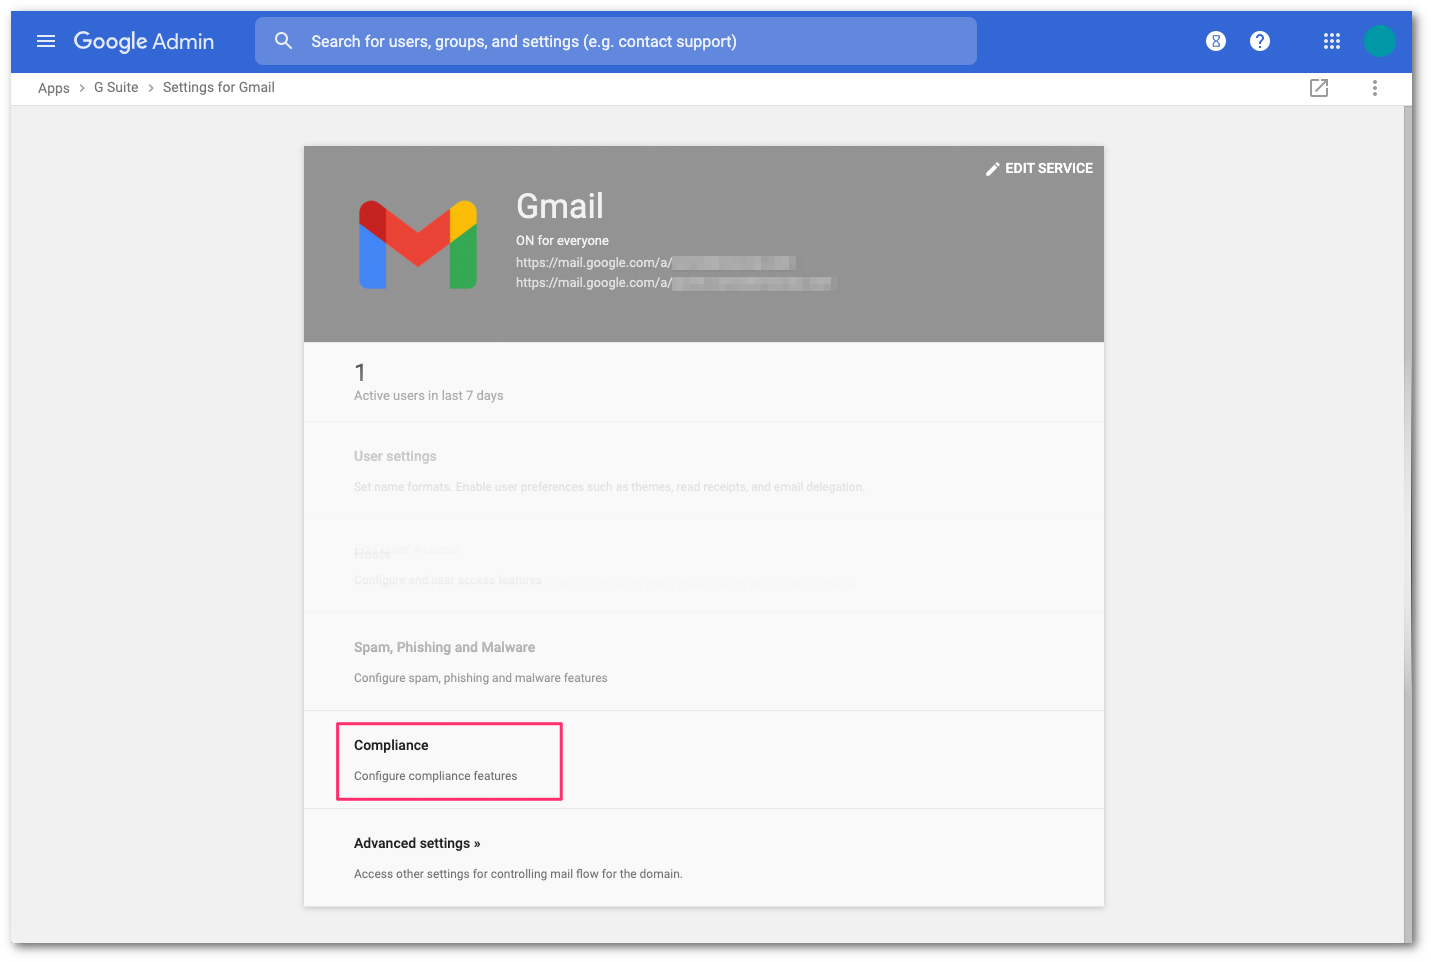
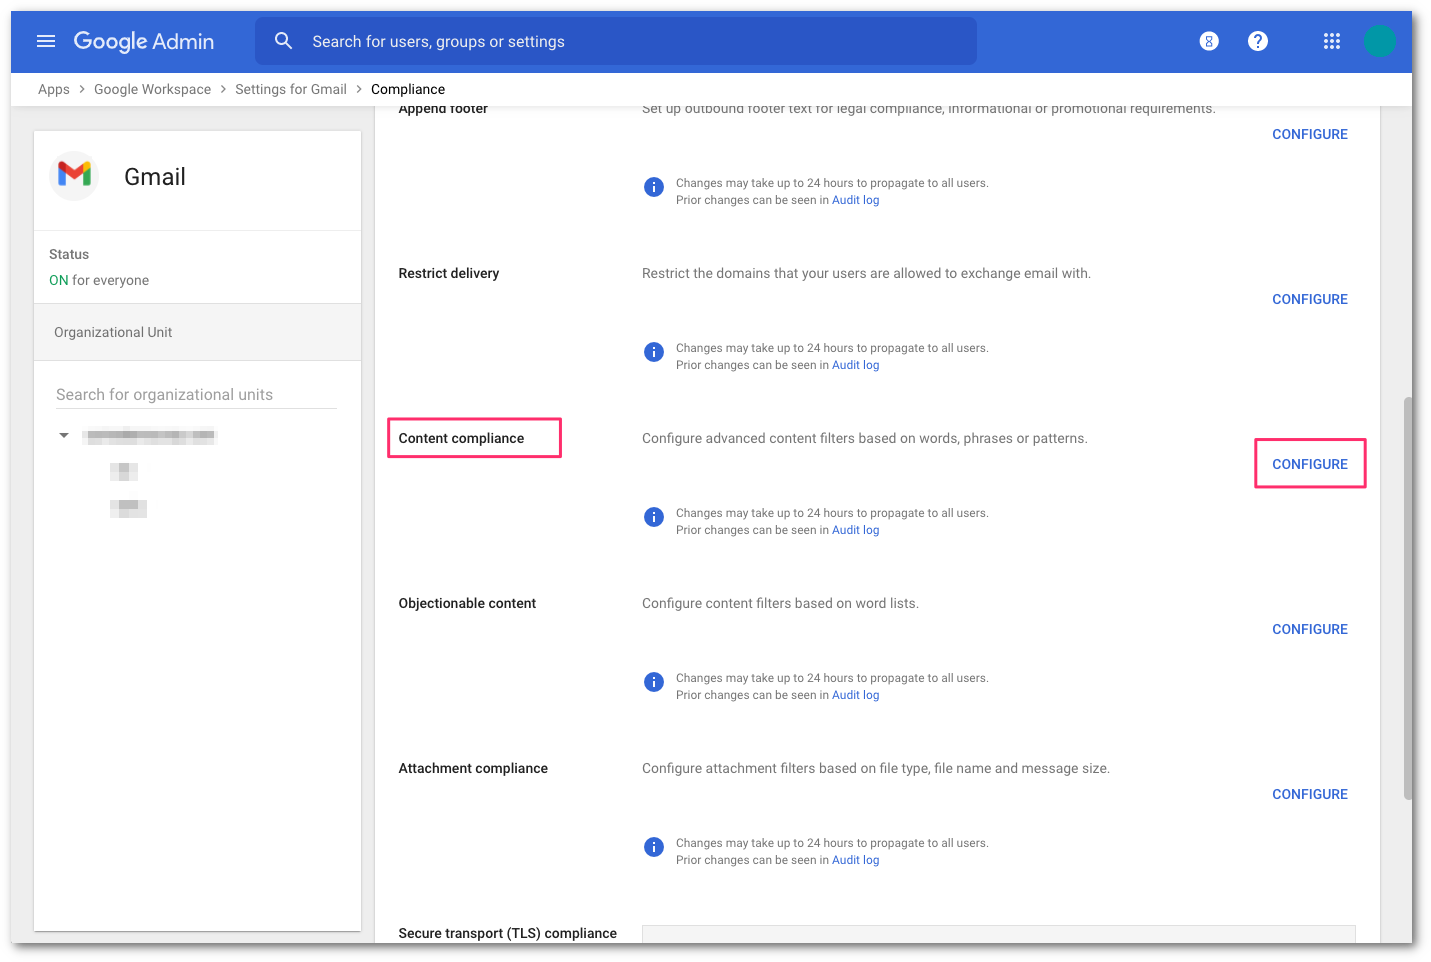
Scroll to Content Compliance and select CONFIGURE.
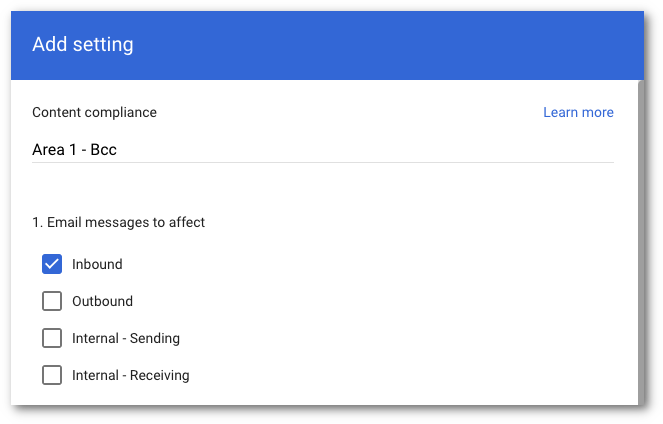
Add a Content Compliance filter and name it
Area 1 - BCC.In Email messages to affect, select Inbound.
Select the recipients that you want to send emails to Area 1 via BCC:
- Select Add to configure the expression.
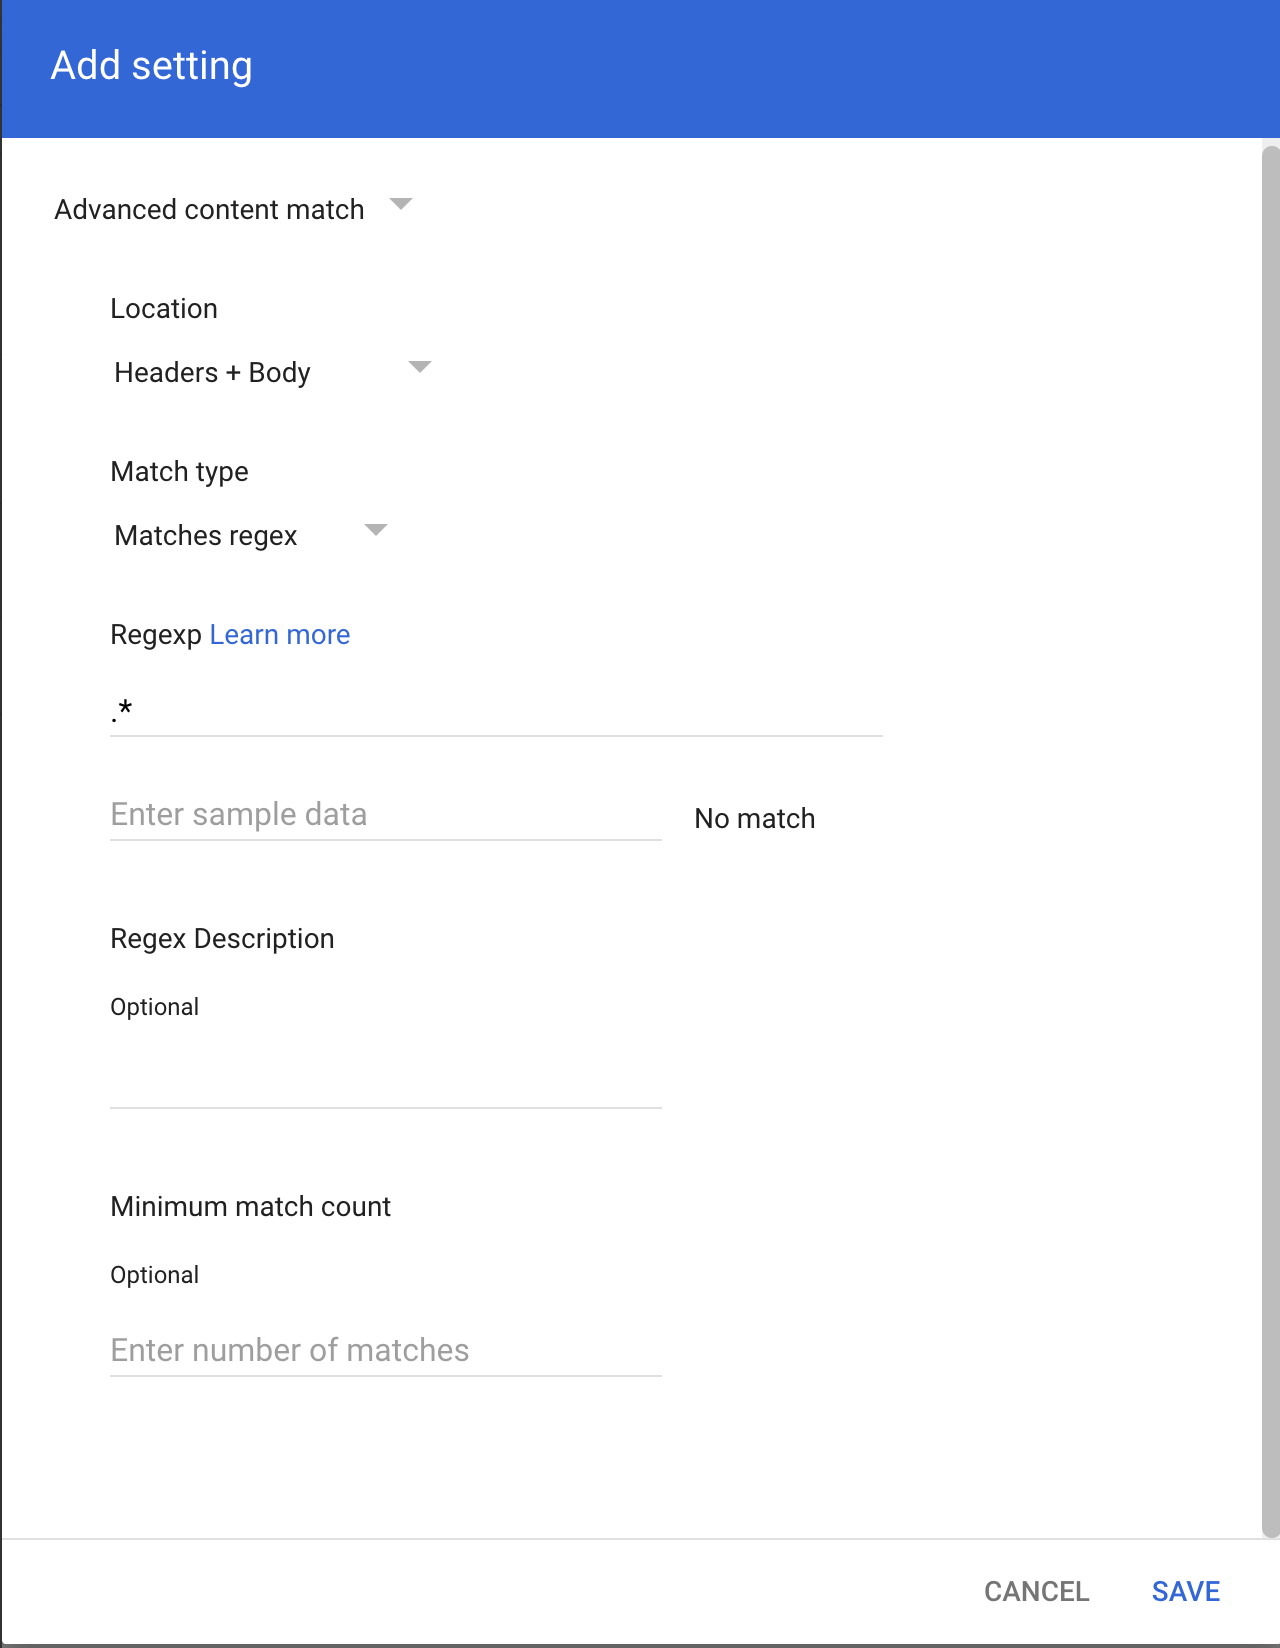
- Select Advanced content match.
- In Location, select Headers + Body from the dropdown.
- In Match type select Matches regex.
- In Regexp input
.*. You can customize the regex as needed and test within the admin page or on sites like https://regexr.com/. - Select SAVE.
In If the above expressions match, do the following, make the following changes:
In Also deliver to select Add more recipients.
- Under Recipients select Add.
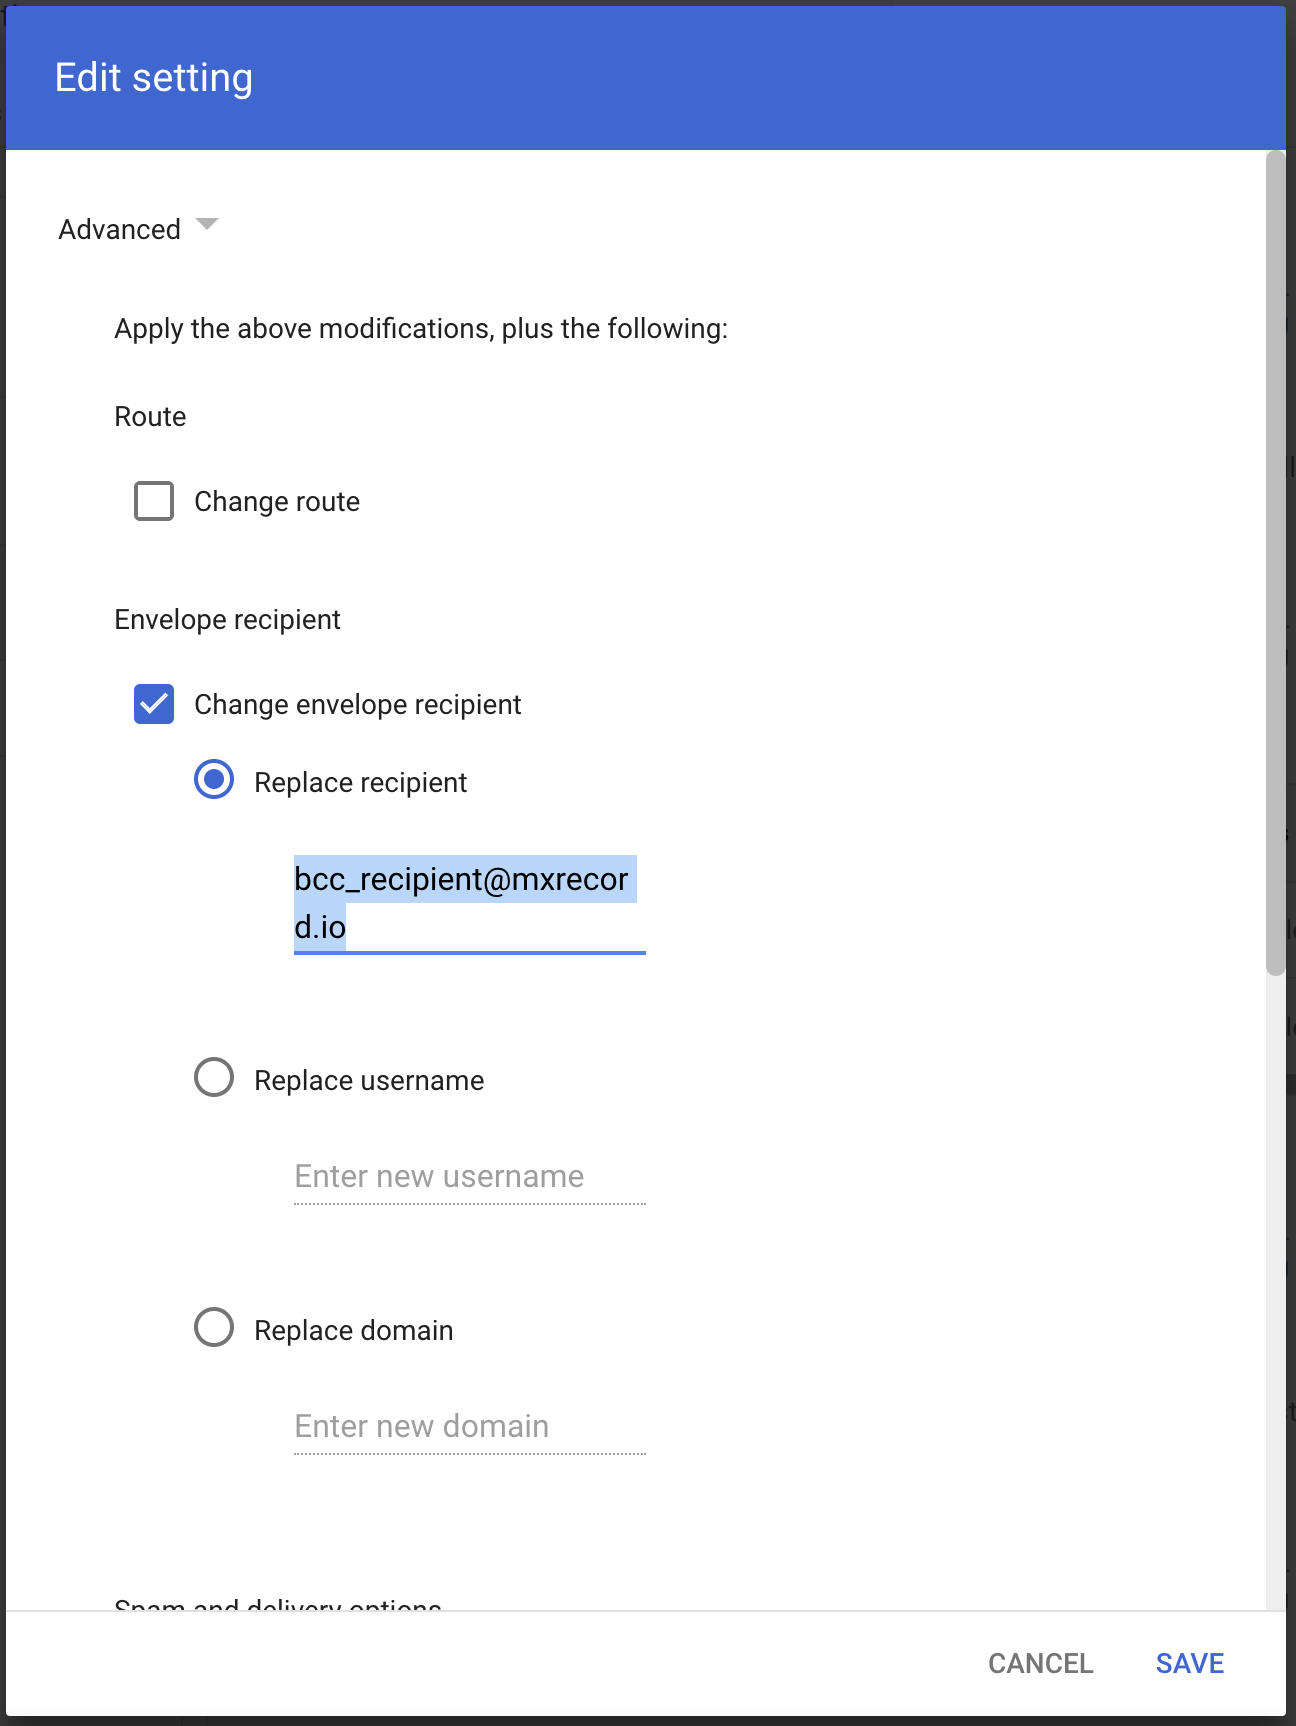
- Change the setting to Advanced.
- In Envelope recipient select Change envelope recipient.
- In Replace recipient add the recipient BCC address. For example,
<customer_name>@journaling.mxrecord.io. This address is specific to each customer tenant and can be found in your Portal.
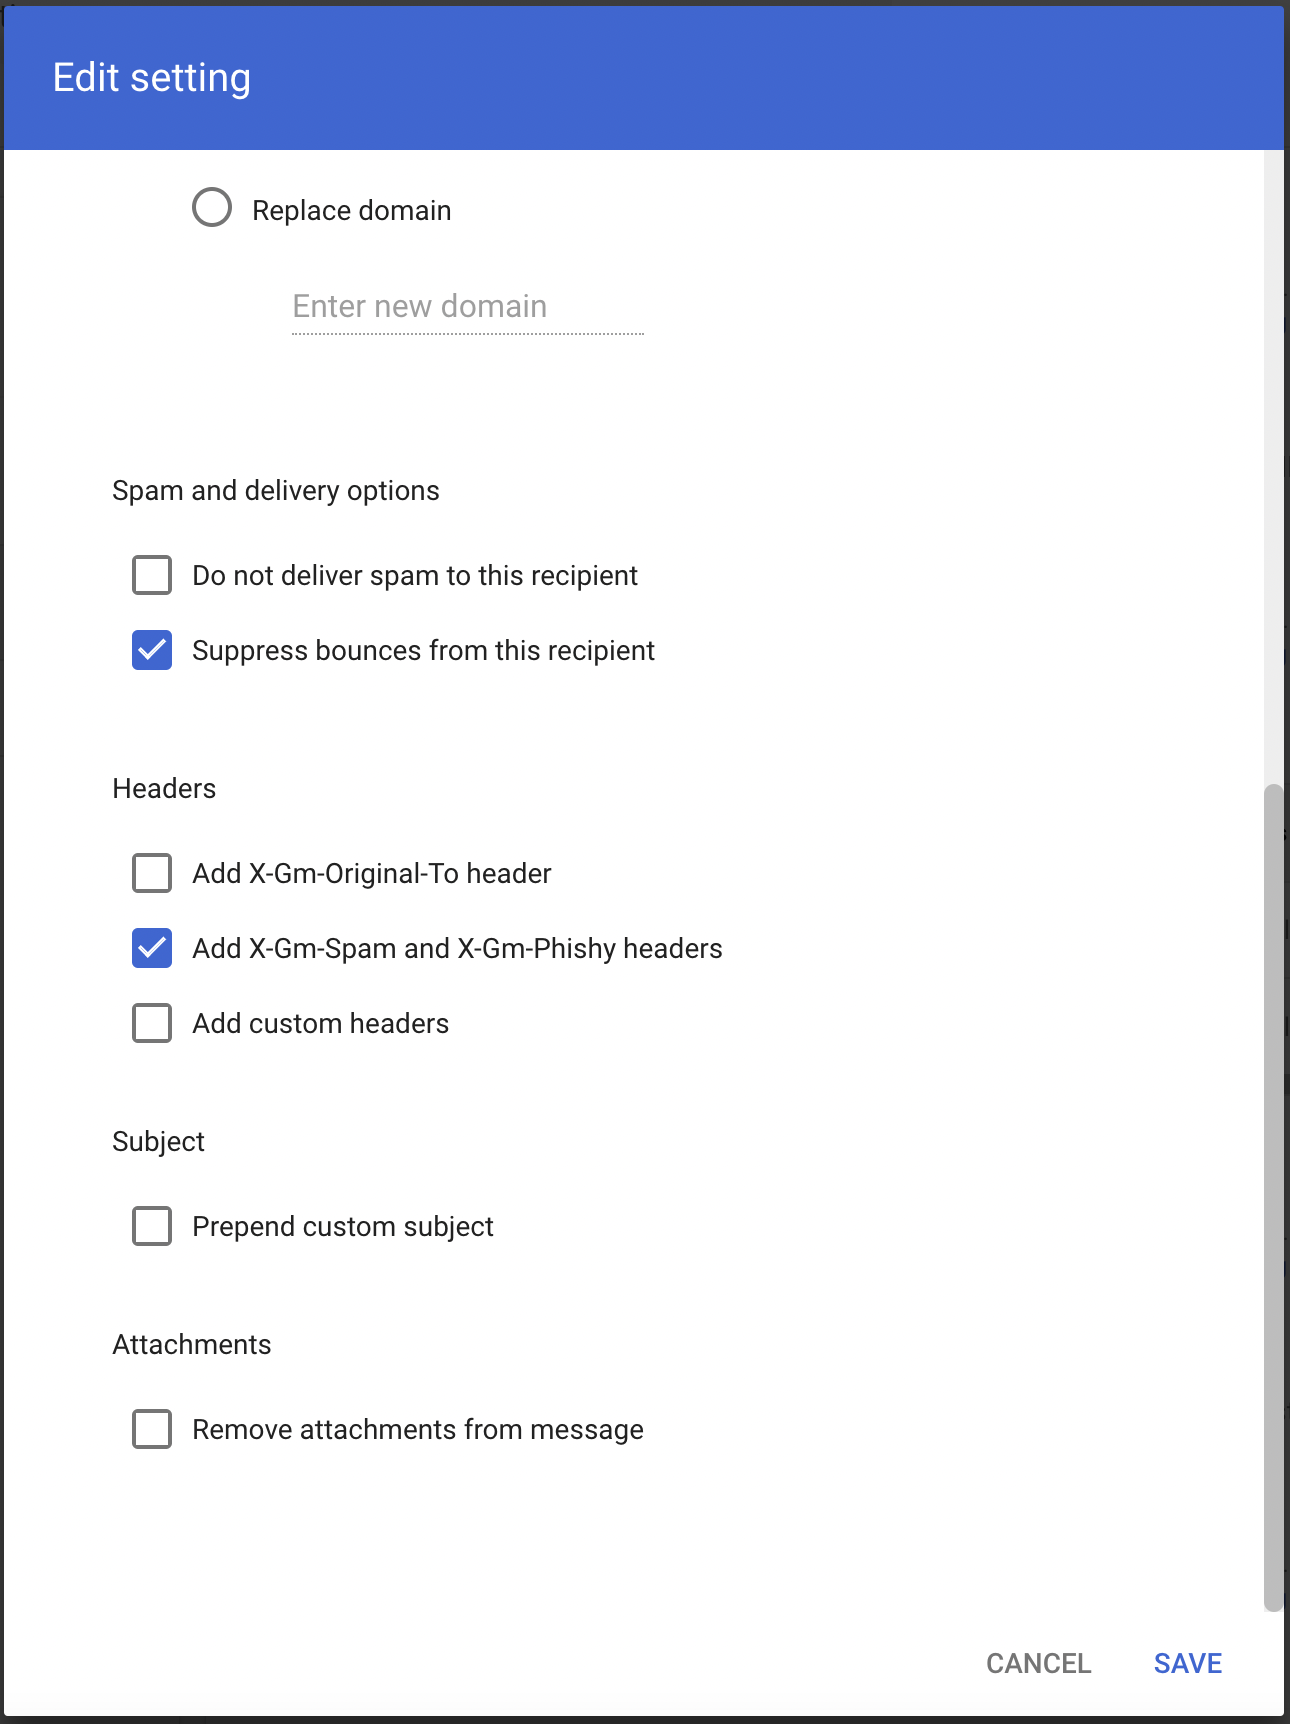
- Make sure that in Spam and delivery options > Do not deliver spam to this recipient is not checked.
- Under Headers select Add X-Gm-Spam and X-Gm-Phishy headers.
- Select SAVE.
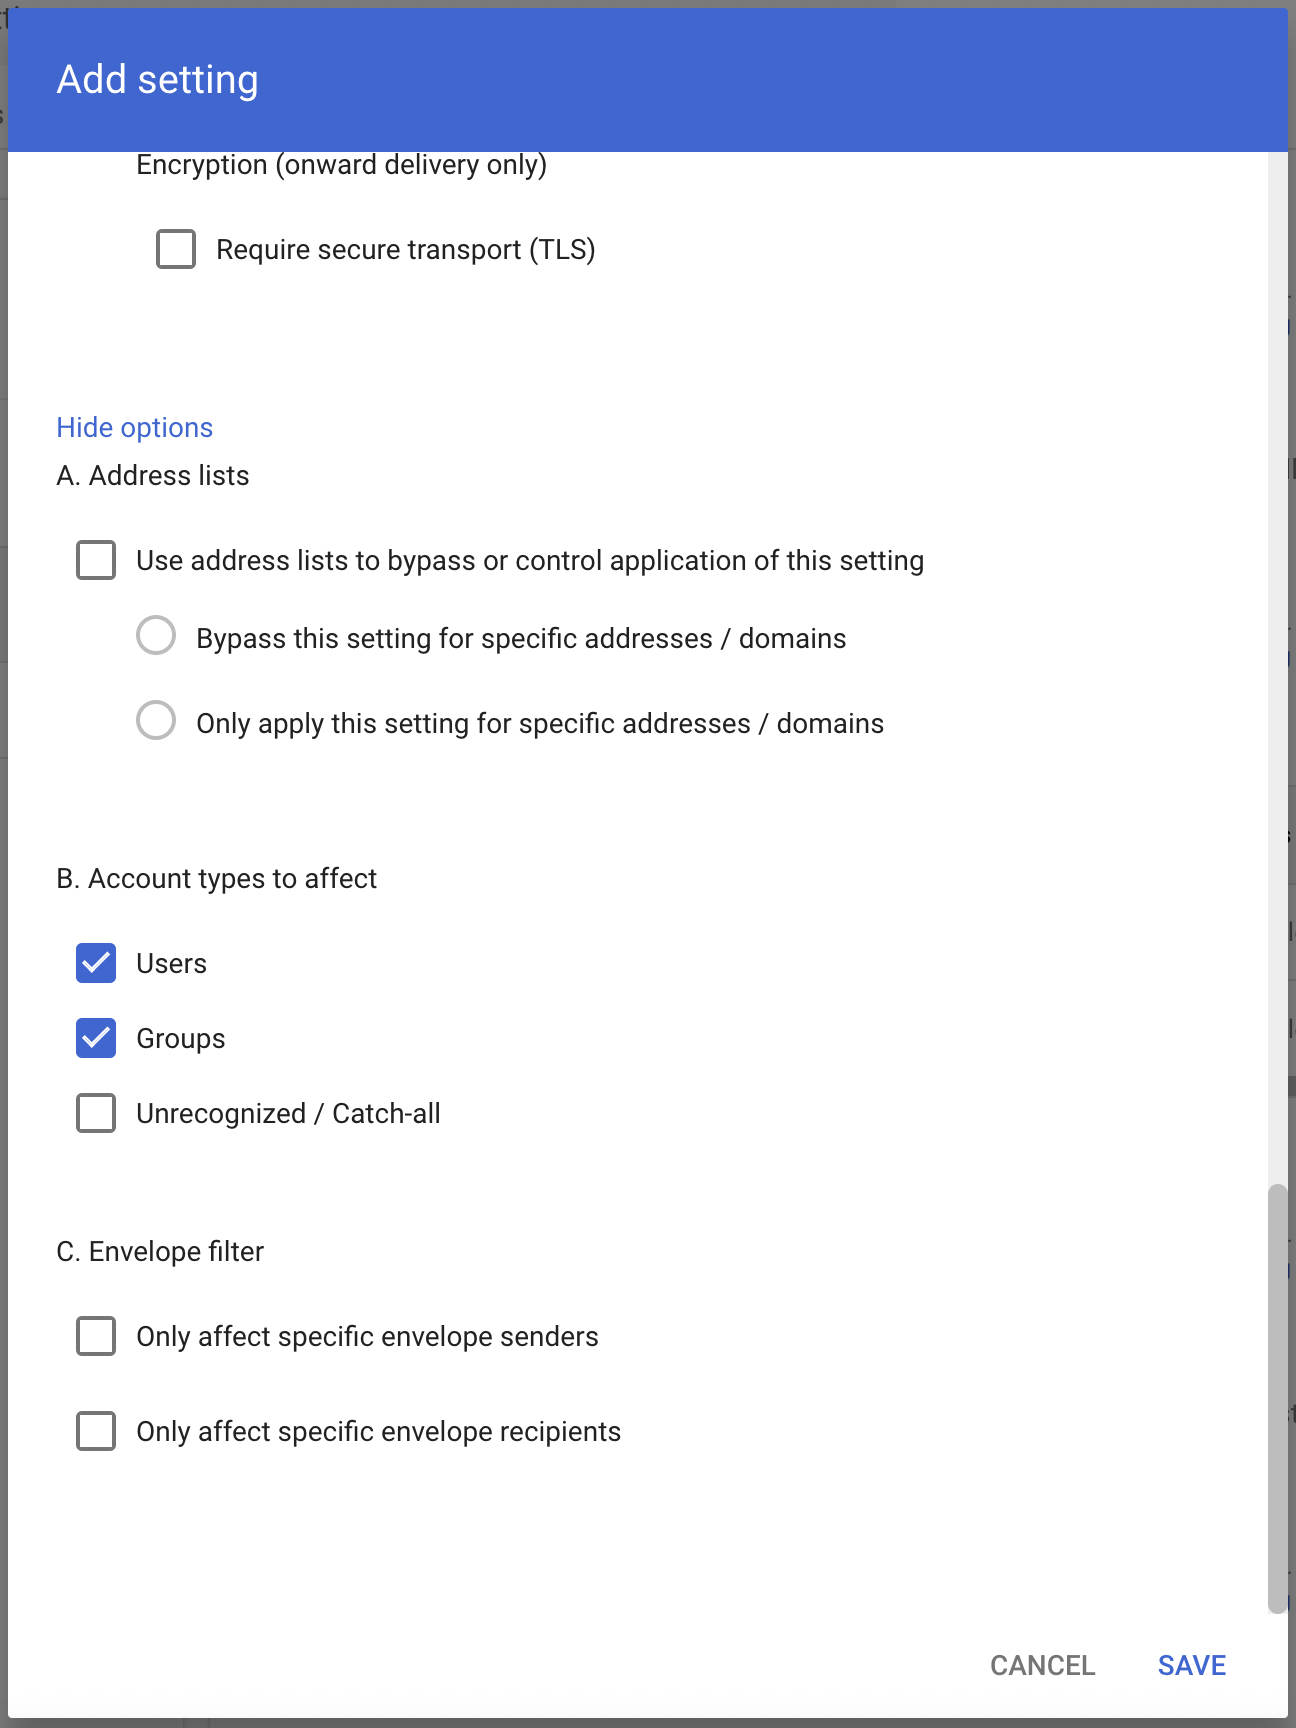
Scroll down and select Show options.
- Under Account types to affect select Groups.
- Select SAVE.
Geographic locations
Select from the following BCC addresses to process email in the correct geographic location.
Host| Location | Note | <customer_name>@journaling.mxrecord.ioUS | Best option to ensure all email traffic processing happens US data centers. | <customer_name>@journaling.mailstream-eu-primary.mxrecord.ioEU | Best option to ensure all email traffic processing happens in Germany, with fallback to US data centers. | <customer_name>@journaling.mailstream-eu1.mxrecord.ioEU | Best option to ensure all email traffic processing happens within the EU without fallback to US data centers. | <customer_name>@journaling.mailstream-bom.mxrecord.mxIndia | Best option to ensure all email traffic processing happens within India. | <customer_name>@journaling.mailstream-india-primary.mxrecord.mxIndia | Same as | mailstream-bom.mxrecord.mx, with fallback to US data centers.<customer_name>@journaling.mailstream-asia.mxrecord.mxIndia | Best option for companies with a broader Asia presence. | <customer_name>@journaling.mailstream-syd.area1.cloudflare.netAustralia / New Zealand | Best option to ensure all email traffic processing happens within Australia. | <customer_name>@journaling.mailstream-australia.area1.cloudflare.netAustralia / New Zealand | Best option to ensure all email traffic processing happens in Australia, with India and US data centers as backup. | |
|---|