Deploy a static WordPress site
Overview
In this guide, you will use a WordPress plugin, Simply Static, to convert your existing WordPress site to a static website deployed with Cloudflare Pages.
Prerequisites
This guide assumes that you are:
- The Administrator account on your WordPress site.
- Able to install WordPress plugins on the site.
Setup
To start, install the Simply Static plugin to export your WordPress site. In your WordPress dashboard, go to Plugins > Add New.
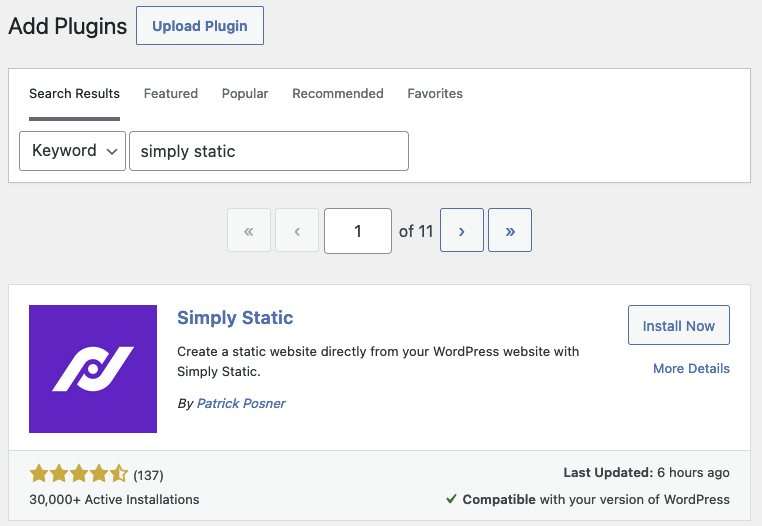
Search for Simply Static and confirm that the resulting plugin that you will be installing matches the plugin below.

Select Install on the plugin. After it has finished installing, select Activate.
Export your WordPress site
After you have installed the plugin, go to your WordPress dashboard > Simply Static > GENERATE STATIC FILES.
In the Activity Log, find the ZIP archive created message and select Click here to download to download your ZIP file.
Deploy your WordPress site with Pages
With your ZIP file downloaded, deploy your site to Pages:
- Log in to the Cloudflare dashboard and select your account.
- In Account Home, select Workers & Pages > Create application > Pages > Upload assets.
- Name your project > Create project.
- Drag and drop your ZIP file or select it from your computer.
- After your files have been uploaded, select Deploy site.
Your WordPress site will now be live on Pages.
Every time you make a change to your WordPress site, you will need to download a new ZIP file from the WordPress dashboard and redeploy to Cloudflare Pages. Automatic updates are not available with the free version of Simply Static.
Limitations
There are some features available in WordPress sites that will not be supported in a static site environment:
- WordPress Forms.
- WordPress Comments.
- Any links to
/wp-adminor similar internal WordPress routes.
Conclusion
By following this guide, you have successfully deployed a static version of your WordPress site to Cloudflare Pages.
With a static version of your site being served, you can:
- Move your WordPress site to a custom domain or subdomain. Refer to Custom domains to learn more.
- Run your WordPress instance locally, or put your WordPress site behind Cloudflare Access to only give access to your contributors. This has a significant effect on the number of attack vectors for your WordPress site and its content.
- Downgrade your WordPress hosting plan to a cheaper plan. Because the memory and bandwidth requirements for your WordPress instance are now smaller, you can often host it on a cheaper plan, or moving to shared hosting.
Connect with the Cloudflare Developer community on Discord to ask questions and discuss the platform with other developers.